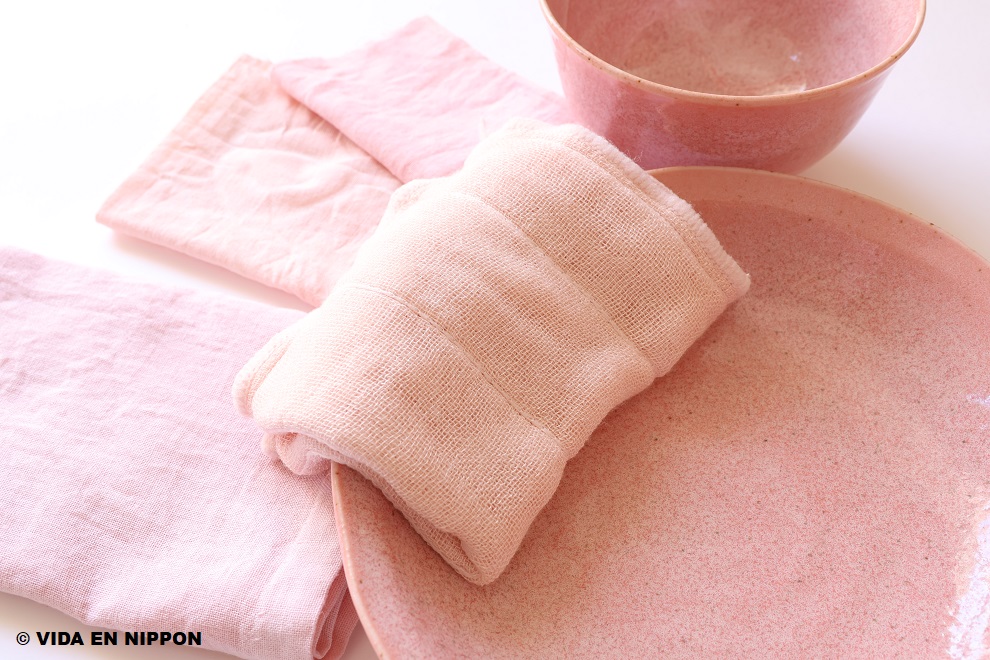
Cherry blossom season is over in Japan.
I miss Sakura a lot.
But I found a great way to enjoy Cherry blossom longer.
That’s “Natural dye”.
This time, I’d like to write about my natural dye experience using Cherry blossom branches.
Dyeing fabric with Cherry blossom branches
These are the fabrics I dyed into pink color.
“Natural dye” in Japanese would be “Kusaki-zome”.
And when you use cherry blossom, the ingredient, it’s called “Sakura-zome”.
This is a very good way to enjoy Cherry blossom longer.
I’m sure I will do Sakura-zome every year!
How to dye fabric with Cherry blossom branches
I’d love to explain how to dye fabric with Cherry blossom branches step by step.
This was my first attempt, so I will show you all the steps I took.
Prepare Cherry blossom branches
Firstly, you need to get some branches of Cherry blossom.
If you want to get the branches from parks, please get permission first.
Another way is just picking up some branches.
After a windy day, sometimes you can find some broken branches under the Cherry blossom trees.
I also heard that you can dye the fabric with Cherry blossom chips, too.
This time, I used some branches of our cherry blossom trees.
The weight was 60g.
Cut the branches short.
Pretreatment using soy milk
These are the fabrics I used for Sakurazome.
The left side of the fabric is cotton 100% and the other one is rayon.
After you wash the fabric, you need to soak them in soy milk.
This is pretreatment.
Protein of the soy milk makes connect the pigment and the fabric.
This time I used milk.
But the smell didn’t go away for a while.
So I recommend you to use soy milk!
I soaked the fabric inside the milk for 20 minutes.
Don’t forget to flip it sometimes.
After the fabric absorbed the soy milk enough, squeeze it very well and dry in the shade!
Boil the Cherry blossom branches in the water
Now let’s prepare a dye-bath.
I boiled the Cherry blossom branches in the water three times and used the third one for a dye-bath.
Let’s start from the first one.
Put the branches into a pot and pour water and a little bit of vinegar in it.
When it starts boiling, lower the fire and keep heating up for 15–20 minutes.
The color was light yellow.
I didn’t use this liquid because I heard that the first boil has off-flavor.
In the same way, let’s boil the branches again.
This is the second liquid.
The color was still light yellow.
To oxidize the liquid, I tried to transfer the liquid in two different bowls, but the color didn’t change a lot.
Next day, I did the third trial.
This time, I got much deeper color.
The color looked like black tea.
These are the results of the liquids from Cherry blossom branches after boiling.
The third one looks so good!
Dye white fabric into the dye-bath
While the dye-bath is still hot, let’s dye the fabrics!
I soaked the fabric into the dye-bath for 10 minutes.
Cute color!
Soak the fabric into water with salt
To make the color stay in the fabric, soak it into salty water.
I left the fabric in the salty water for 10 minutes.
If you want deeper color, you can repeat the process again.(dye and put the fabric into salty water!)
Dry the fabric in the shade
When you are satisfied with the color, dry the fabric in the shade.
Done!
Here are the Cherry blossom colored fabrics!
I’m so happy that the fabrics have Cherry blossom color now.
This is the color of the Cherry blossom 2024!
I really hope the color will last long.
If you want to enjoy Sakura even after the season is over, please try !
I did “sashiko” on one fabric. This time, I sewed Asanoha pattern.
About Sashiko, please check this article!

